Amigurumi Duck Crochet Tutorial: Step-by-Step Guide
DIY Projects

Amigurumi Duck Crochet Tutorial: Step-by-Step Guide

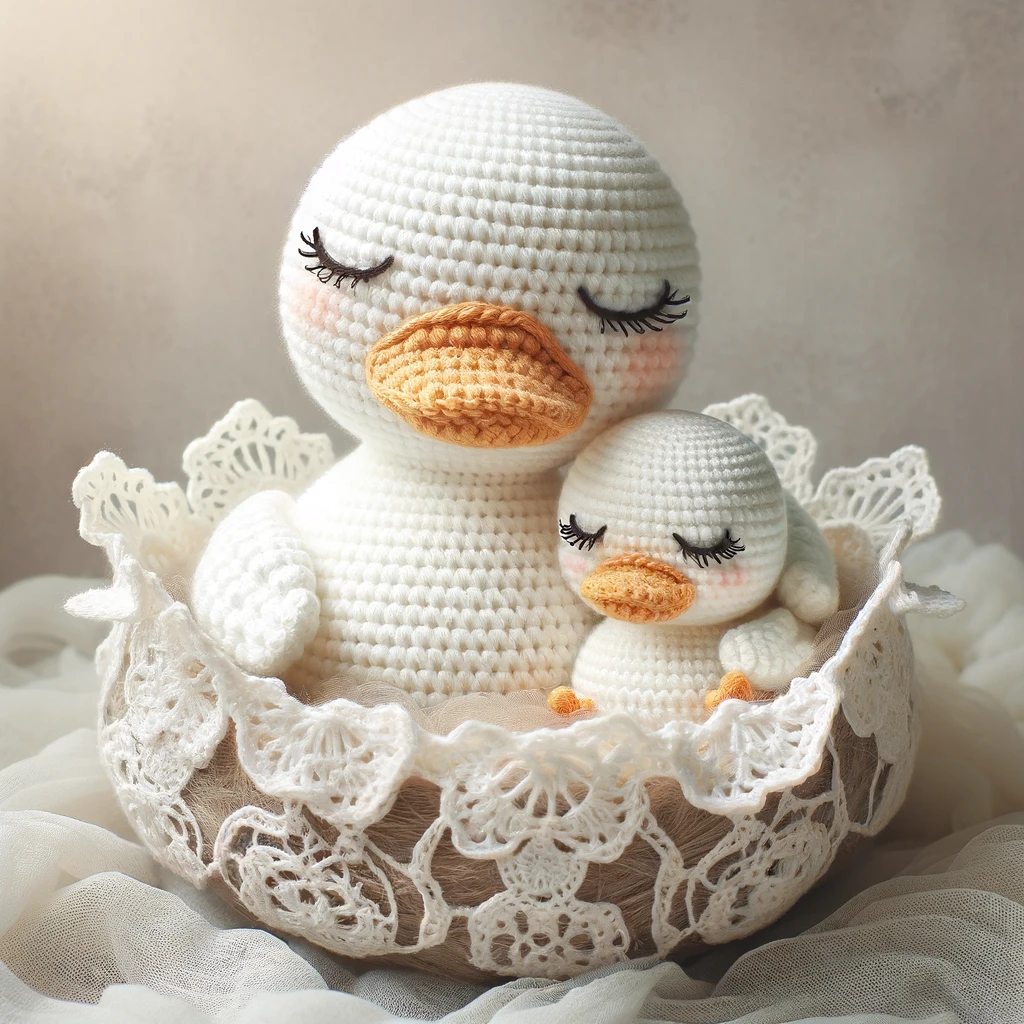
I'll prepare a step-by-step guide for making these cute amigurumi ducks. Before we start, let's list the materials you'll need:

Materials:

  1. White amigurumi yarn
  2. Orange amigurumi yarn (for the beak and feet)
  3. 2.5 mm crochet hook
  4. Fiberfill stuffing
  5. Needle and thread (for details)

General Terms:

  • Single crochet (SC)
  • Decrease (DEC)
  • Increase (INC)
  • Chain (CH)

Adult Duck:

Body:

  1. Make a magic ring and crochet 6 SC into it.
  2. Increase in each stitch around (12 SC).
  3. (1 SC, 1 INC) x 6 (18 SC).
  4. (2 SC, 1 INC) x 6 (24 SC).
  5. (3 SC, 1 INC) x 6 (30 SC).
  6. Crochet 30 SC for 10 rounds.
  7. (3 SC, 1 DEC) x 6 (24 SC).
  8. (2 SC, 1 DEC) x 6 (18 SC).
  9. Stuff with fiberfill.
  10. (1 SC, 1 DEC) x 6 (12 SC).
  11. (1 DEC) x 6 (6 SC).
  12. Fasten off and weave in the ends.

Head:

  1. Make a magic ring and crochet 6 SC into it.
  2. Increase in each stitch around (12 SC).
  3. (1 SC, 1 INC) x 6 (18 SC).
  4. (2 SC, 1 INC) x 6 (24 SC).
  5. Crochet 24 SC for 6 rounds.
  6. (2 SC, 1 DEC) x 6 (18 SC).
  7. (1 SC, 1 DEC) x 6 (12 SC).
  8. Stuff with fiberfill.
  9. (1 DEC) x 6 (6 SC).
  10. Fasten off and weave in the ends.

Wings (Make 2):

  1. Make a magic ring and crochet 6 SC into it.
  2. Increase in each stitch around (12 SC).
  3. Crochet 12 SC for 5 rounds.
  4. Fasten off and leave a long tail for sewing.

Beak:

  1. Using orange yarn, make a magic ring and crochet 6 SC into it.
  2. Increase in each stitch around (12 SC).
  3. Crochet 12 SC for 2 rounds.
  4. Fasten off and leave a long tail for sewing.

Feet (Make 2):

  1. Using orange yarn, make a magic ring and crochet 6 SC into it.
  2. Increase in each stitch around (12 SC).
  3. Crochet 12 SC for 2 rounds.
  4. Fasten off and leave a long tail for sewing.

Baby Duck:

The baby duck is made similarly to the adult duck but with fewer rounds.

Body:

  1. Make a magic ring and crochet 6 SC into it.
  2. Increase in each stitch around (12 SC).
  3. (1 SC, 1 INC) x 6 (18 SC).
  4. Crochet 18 SC for 6 rounds.
  5. (1 SC, 1 DEC) x 6 (12 SC).
  6. Stuff with fiberfill.
  7. (1 DEC) x 6 (6 SC).
  8. Fasten off and weave in the ends.

Head:

  1. Make a magic ring and crochet 6 SC into it.
  2. Increase in each stitch around (12 SC).
  3. (1 SC, 1 INC) x 6 (18 SC).
  4. Crochet 18 SC for 3 rounds.
  5. (1 SC, 1 DEC) x 6 (12 SC).
  6. Stuff with fiberfill.
  7. (1 DEC) x 6 (6 SC).
  8. Fasten off and weave in the ends.

Other Parts:

The wings, beak, and feet for the baby duck are made using the same steps as for the adult duck, but you can reduce the rounds to make them smaller.

Assembly:

  1. Sew the head to the body.
  2. Sew the wings to the body.
  3. Sew the beak to the head.
  4. Sew the feet to the body.
  5. Embroider the eyes or use small beads.

By following these steps, you can create these adorable amigurumi ducks. Happy crocheting!

There are no comments yet.
Comment

Would you like to receive priority news from the content we shared recently?

As an e-mail subscriber, you can get the latest articles to your e-mail address.